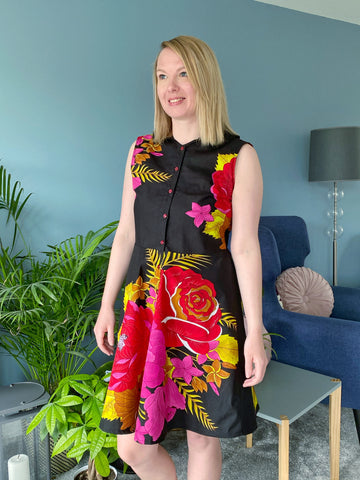
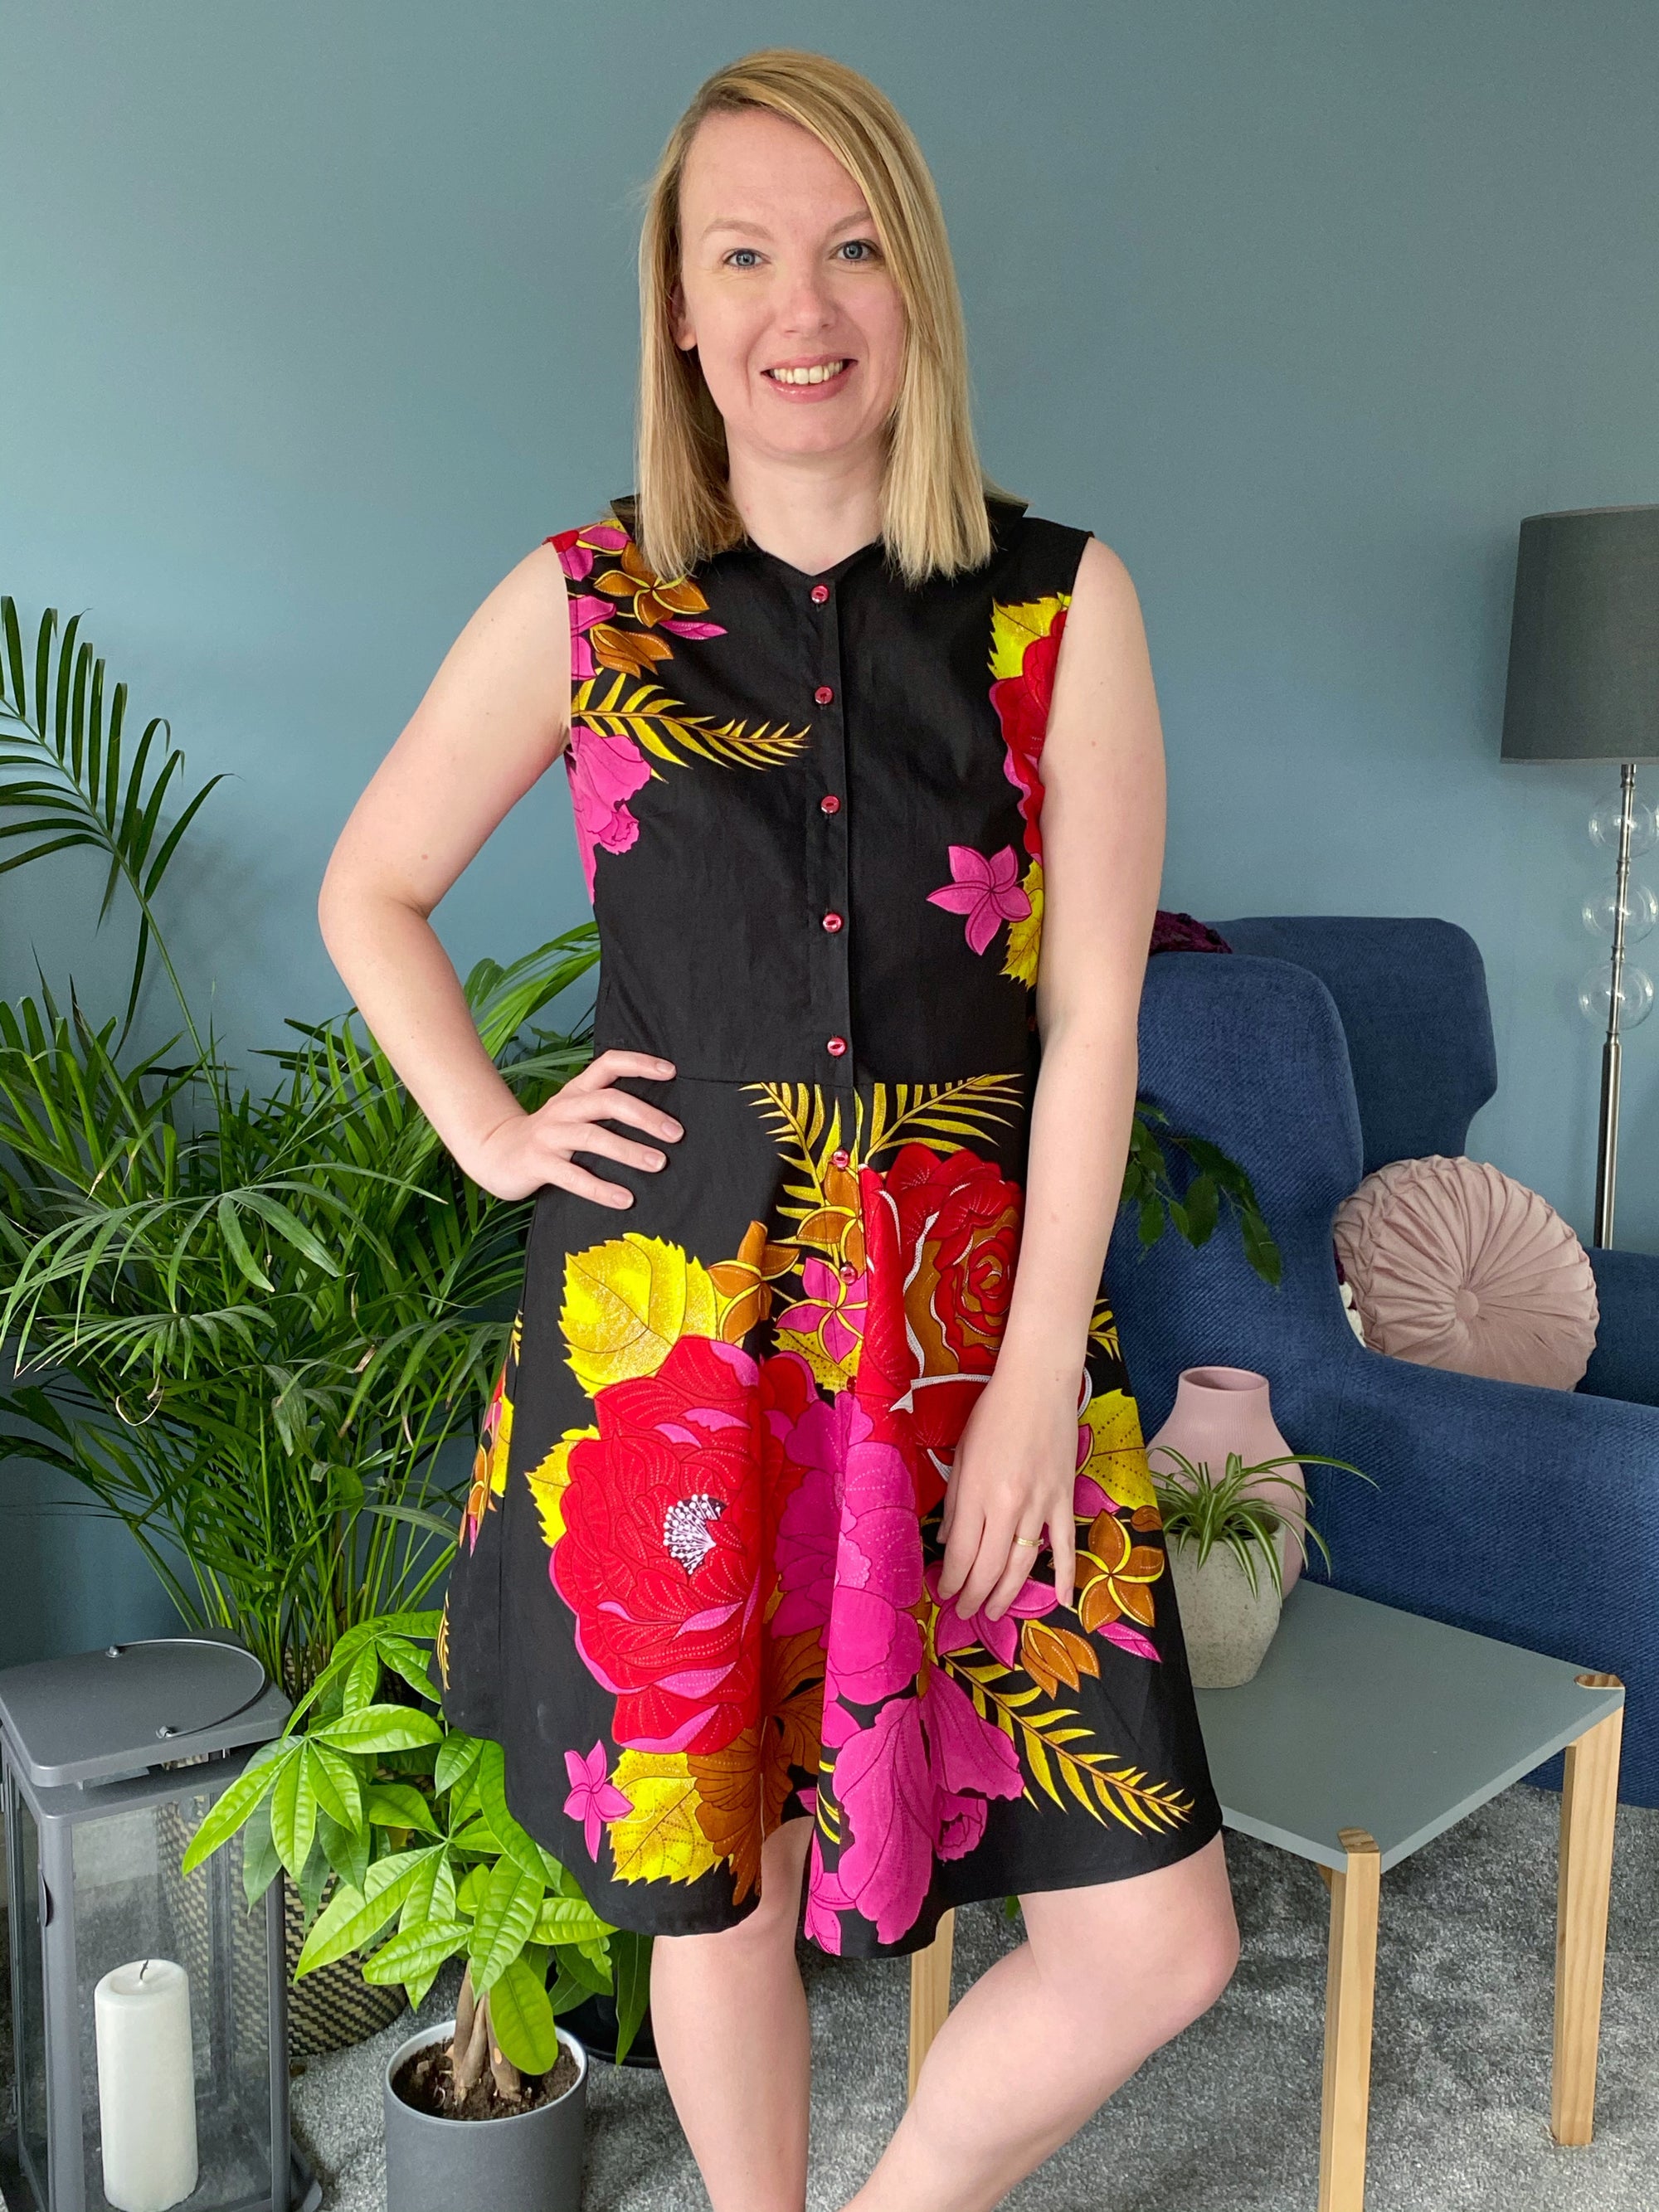
So far, the Etta dress appears to be a bit of a favourite! It's definitely one to build up to and in this guest blog post, the lovely Adelle (@button_and_pip) shares the process that she used to make her stunning version of the Etta Shirt Dress in African wax print fabric that I have called: 'Black Flower Garden'. This pattern shows off beautifully this large bold print and it is available in my sewing book: Sewing With African Wax Print Fabric. New to African Wax Print Fabric? Then you will love this super detailed blog post. Grab a cup of your favourite drink and enjoy!!
Hi I’m Adelle @button_and_pip and I’m passionate about creating a handmade wardrobe. Last summer I made my first dress from African Wax print and I soon fell in love with the vibrancy of these fabrics. I’m never one to shy away from print and colour, that’s one aspect that drew me into dressmaking. The freedom to choose the style, the colour and print of my wardrobe gets me excited every time I sit down at my sewing machine.

The new book from Adaku ‘Sewing with African Wax Prints’ is a project book full with colour and inspiration. The opening chapter of the book details how to make the most of the print, and how to prepare the fabric. Prewashing before you sew is important, it softens up the fabric and it will continue to soften the more you wash your garment. African wax print fabrics are also perfect for new beginner dressmakers, being woven they are easy to create a variety of different projects from. From the projects within the book, the Etta dress was the one I just said ‘wow” as I turned the page! A classic shirt dress which a closely fitted bodice teamed with a flared skirt. A timeless piece that will be perfect for the summer days to come.

I traced off a size 12 from the pattern pieces using baking paper, a cheap alternative to pattern paper. There are indications of where to lengthen or shorten the pattern but I made it the standard size. The fabric I choose for this project is called ‘Black Flower Garden’ a black based background, scattered with a assortment of vibrant pink, red and yellow flowers. This soon got me thinking about pattern placement. I wanted a subtle bodice and have the print shine through on the skirt. I also decided to place the full flower motif on the back of the bodice. If you are using a directional print, a option here would be to play with direction and have a contrasting bodice and skirt.

Creating the dress begins with the bodice, always ensure you press your bust darts well. I finish the end of the dart by reducing my stitch length meaning that I do not need to tie off the ends of the thread. Next is the skirt piece and then you join the bodice and skirt together. I match up seams before pinning the rest of the seam. The woven fabric does not easily fray so you can finish the seams in whichever is your preferred method. I like to use my overlocker as it gives my confidence that the garment will survive the washing machine without fraying. I increased the width of the button placket fold from 1cm to 2cm. I did this after trying on the dress and I had enough room to do this.

This pattern has a difficulty rating of 3 stars and the most challenging part was fitting the collar. The dress uses the collar piece from the Mary shirt. The illustrations accompanying the instructions show the attachment clearly. If it’s the first collar you’ve fitted don’t feel despondent if you need to reach for the seam ripper. Match up the back midpoint point first and move around the the front. There are notches here also to help with the placement. After fitting the collar, pressing is very important, don’t ever skip the pressing stage!

I finished the armholes with bias binding as I think this will ensure that the armholes will remain crisp after washing. When placing the buttonholes, I also moved away from the pattern suggestion. I have found in the past due to my bust often being a different place to the pattern block, I’m left with a gape mid bodice. So instead I first marked a buttonhole at the bust and waist. Then using these 2 points, planned the remaining buttonholes. I also placed a button at the top, which gives me to option to wear it fully buttoned up and also open at the neckline. Choosing buttons to finish the dress was careful decision. I settled on a subtle small red button, to compliment the flowers and to break up the plain black bodice.

My Etta dress will be perfect for the summer months ahead, worn with sandals but also dressed up with heels. I also think that it could take me through to autumn and winter, teamed with tights and a cardigan. Thank you to Adaku for asking me to create this project from her new book.

Shop Black Flower Garden here.
Shop Sewing with African Wax Print Book here.


Comments
Thank you for your article. It will definitely help me a lot…
Amazing piece of content, Thank you for sharing this blog….